Saturday 28 December 2013

ARTDECO Eyeshadow base review


I have received this eyeshadow back in SASA X Artdeco event launching on last month I believe. But only recently I'm addicted to use and include this cream base eyeshadow into my routine daily makeup. 


What's special about this base eyeshadow?

This is one of the best-seller product in Artdeco line. That is one the facts. 

Second, it is petite, travel-friendly and light. I like this, easy to apply, just rub and take as much product as we need only and apply on lids.

Third, the texture is smooth, easy to use, glides smoothly on lids and doesn't look patchy. I don't have many eyeshadow base, but this one is the silkiest and smoothest base eyeshadow I ever had. (Other one I have in my collection, which is one of the high end products, it is very patchy on eyelids and very hard to blend plus the texture is like wax). but surprisingly, this eyeshadow base turned out very good, amazingly smooth & blendable. 

Forth, it makes the eyeshadow stay all day long. Ok I lied, so far the longest time I've worn this eyeshadow was only 8 hours then I washed it out. haha. Haven't tested it out in 24 hours. but come on, who gonna eyeshadow up to 24 hours? The longest time you will wear them is about 14 hours? So far 8 hours the power of the color is still remaining there. 

Fifth, the cream is sheer but has shimmer in it. Only micro shimmer particles that does not look too obvious. Just nice, if you wear matte eyeshadow on top of it, it would not effect the matte eyeshadow. The matte would look matte, won't be shimmery. ^^ 


Function of eyeshadow base: To prime your eyelids before applying eyeshadow. Why? To get vibrant eyeshadow color and to make the eyeshadow stay all the long. Not only that, to get less fall out during eyeshadow application. 


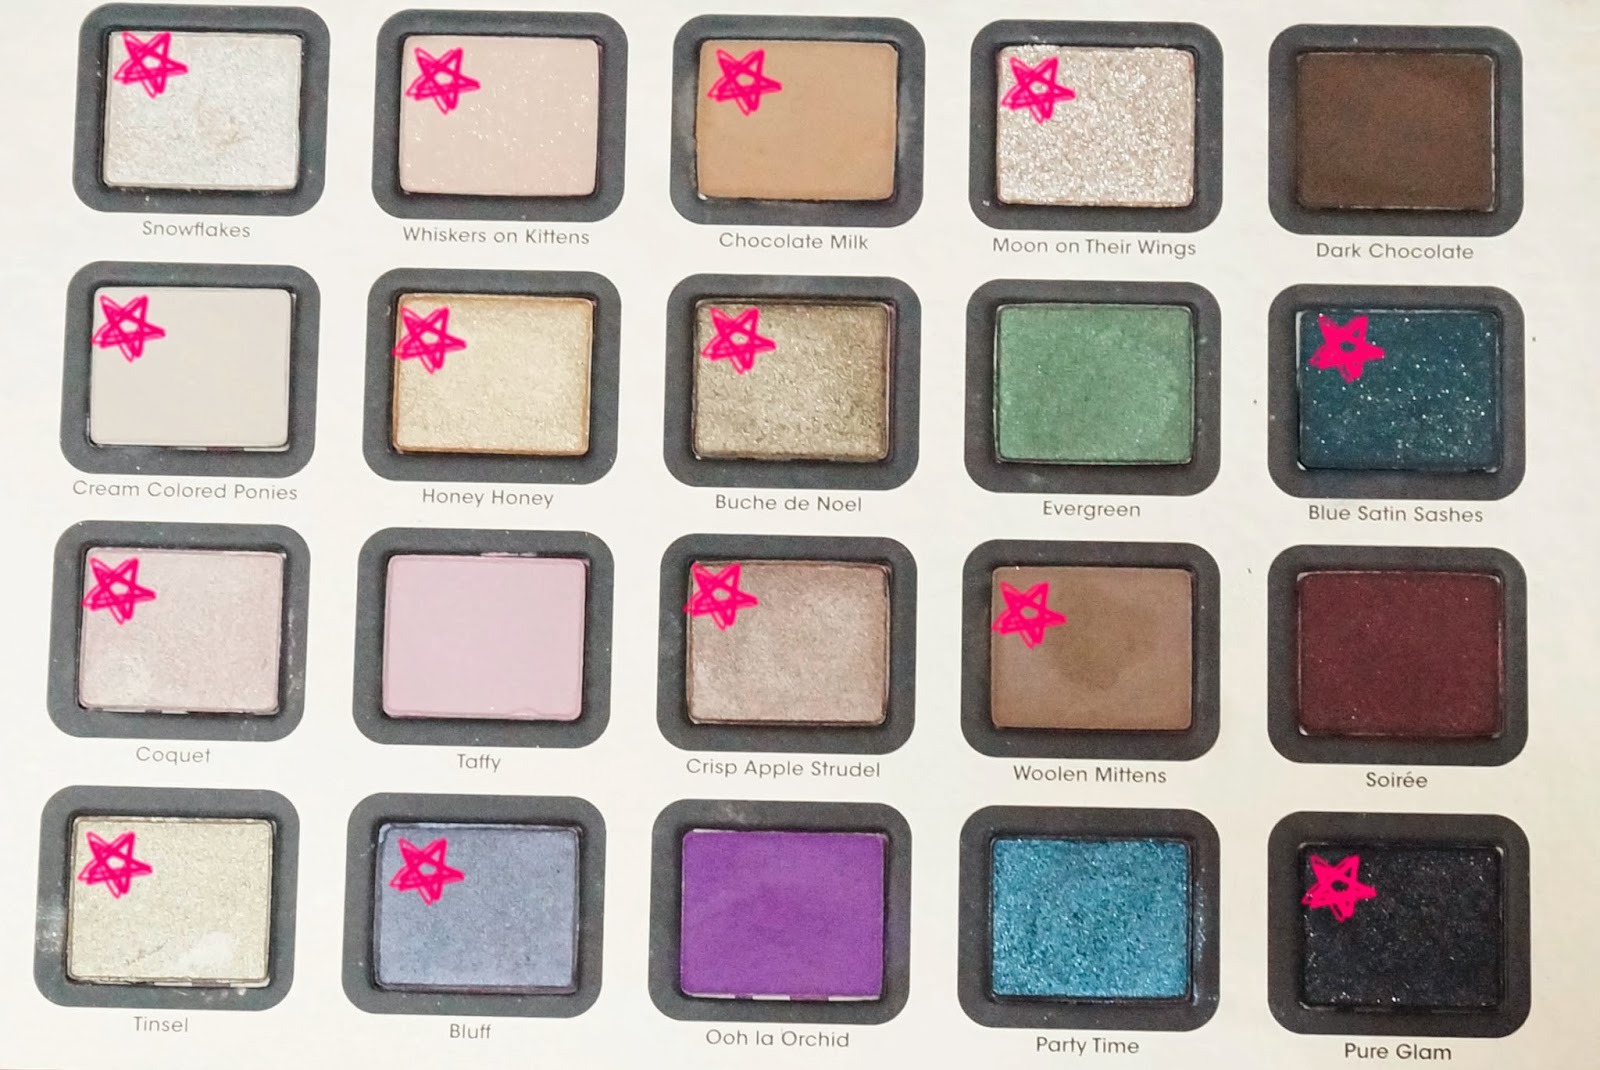
This is the swatches of the base eyeshadow, in the photo I doesn't blend it well in order to show you the true color of the cream base shadow. 


This shows how amazing is the power of base eyeshadow. hehe. It picks up eyeshadow color nicely on skin and at the same time makes the color stay in placed. Great eyeshadow base. 4 over 5 stars for it! 


Where to get this eyeshadow base: SASA outlets in Malaysia
Price: RM 59
Made in Germany


Wiida Ribbon


Friday 27 December 2013

Simple Makeup Tutorial


FACE


So first step is, apply bb cream or foundation or cc cream or any kind of cream you like. This time I applied bb cream because I want something light and not too heavy. But for normal day, I normally prefer foundation, only in this tutorial I feel like using BB cream. BB cream is great for those who doesn't like thick foundation texture. ^^

Then, you may blush you cheeks with your preference color. Some people doesn't like blusher because they feel the color is too strong and bright. To get natural blush color, you may control the amount of powder and instead of swiping the blush on cheek, maybe you can slowly dab the powder on cheeks. This would helps you to control the amount of powder applied. 


EYES

To make the eyeshadow stay all day long , apply eyeshadow base or any cream shadow all over the lids. In this tutorial, I'm using Maybelline Color Tatoo in Bold Gold. Do not forget to fill in the your brow gaps with natural eyebrow color. If you do not know how to shape it, just fill in it and blend it naturally. :) 


For the eyeshadow, I used Maybelline Quad eyeshadow palette in Copper Brown.

Number 1)  Apply the shade all over the lids
Number 2) Apply the shade number 2 on eyebrow bone, just to highlight the bone.
Number 3) Apply the shade at the crease/ eye socket. Gently blend inward and outward.


What is Eye socket/ crease? 
This is a great question. You may proceed to the next photo.


This is the crease/ eye socket. Just follow your eyeball shape and blending it out! Normally, people apply dark color at this shape to contour and make the eyes look bigger and depth.

Next, to make the eyes look bigger and sharp, apply some eyeshadow at the bottom of the eyes (refer to the photo) I applied shade number 1. 


For eyeliner, the first step is do little wings at the end of eyes. Then, start do quarter or half eyeliner at the end of the eyes and join with the wings.
Basically this method you make your life easier. Sometimes if we do full eyeliner, one eye will look bigger than another one. With this method, tendency to do mistake is low. If do, just take cotton bud (mix with eye remover), remove a bit, and cover it with eyeshadow. Do it again, slowly and steady. 

For bottom eyeliner, half at the end of eyes, I applied pencil eyeliner in black from Maybelline and another half toward inner corner of the eyes, I applied gold eyeliner pencil from Silkygirl. 
Optional: Apply silver eyeliner on the waterline. 


LIPS!
So for the lips, I give you 3 options. 


One, just use Lip Ice, giving you natural moisturized lips color. 

Second, use lipstick, just dab evenly on lips. Do not swipe, this is to avoid heavy lips color look. 

Third is by using lip tint/ gloss stain or any kind of tinted lip products in the market. Just apply at the centre of the lips and Muaaah! done. This is called, Korean style babe! 


Well, this is the finish look for the simple day makeup tutorial. 
Hope you enjoyed reading this simple tutorial! 


Ops! Fail poses!


Wiida Ribbon

Wednesday 25 December 2013

Rouge DIOR Lipstick in Hyde Park (775) Review


Hyde Park, is a new color came out during the Fall collection 2013. 


Longevity
I found out that  it lasted up to six hours from 10 am until 3 pm and it started fading off after I had my lunch. I did touch up the lip color after eaten, yet the color was remain there but not solid as before.

The texture.
It glides smoothly and silky on my lips and at the same time moisturize my lips without makes it feel sticky and heavy.The color is truly opaque, bold and highly pigmented. Enough with single stroke, it could reach the full coverage. 
Amazingly smooth, buttery and silky on lips! (no oily sticky feeling)
The color
It is can be described as Strawberry red with hint of pink. At first, in the store, I thought the color is more into bright fuchsia pink. But later on, after I applied it on lips and wear it in public, I feel the color is not fuchsia anymore, it is more into strawberry red (red with pink undertone). I'm glad that I chose this color for my first Dior lipstick.

The packaging
Very classy and elegant. The lock click secures the lipstick tube. No worries to bring it in purse.


Rate: Full 5 stars!


What do you think about this lipstick?
 Love it or leave it?
You should try it in store one day! It is my love! Whenever I have cracked lips, I will use this lipstick to cover my chapped lips. hehe. great trick ya? hehehe. 


Wiida Ribbon


Wiida in local Newspaper UTUSAN MALAYSIA


Alhamdullilah, I got myself in local newspaper, Utusan Malaysia. Thank you to those who helped and cooperated into this interview either directly or indirectly. Thanks to Yuji, kak Ruby, Pak Ya , mak,ayah, blogger friends, best friends and YOU! <3

Newspaper: Utusan Malaysia
Section: Blogger Pilihan
Date: 21st December 2013
Day: Saturday

I went to my cousin's wedding on that day and quite busy to post it up in morning. :( but glad some of my friends noticed it and tagged me on Facebook. Thank you so much <3 

Don't forget to follow my twitter, facebook page and instagram! Thank you :)))
Oh ya! peeps! after the news came out, my twitter followers instantly boost up. Wow! crazy huh? Instagram followers increased to 400+ . Alhamdullilah. <3 This happened to me on the past Maybelline contest, instagram followers boosted up to 300-400+  followers (can't really recall, maybe 500.).. but on that time I didn't really active my twitter so do my facebook page. Hope you guys can like my facebook page, follow my twitter and instagram. Thank you very much. A big thank  you to YOU! Anyway, Renee America's Next top model replied my tweet ! hahaha. (too soon to be happy ya?) hahah. syok sendiri!

InsyaAllah, I will do a giveaway to my readers as a token appreciation for following and read my blog. It's a New Year giveaway! Hope next year will be a better year and more giveaways to be given in next year! oh yeay! Alhamdullilah to all rezeki received, syukur, I'm so thankful to Allah. Love, Wiida.

Wiida Ribbon


Extra Talk
My mom commented: Awat senyum nampak gigi lagi tu? cuba senyum tak nampak gigi
My reaction : hurgh?! =,="
My dad reaction: Mat Salleh suka orang senyum nampak gigi. This is a good photo to them.
My reaction : haha. *proud for awhile/bangga sat
My mom replied: Tu Mat salleh, ni Malaysia. 
My reaction: Oh mak! potong stim, baru nak perasan sendiri. =,=" 

Kedah accent applied because we were in Kedah on that time. 


Review & Swatches: Too Faced A Few of My Favorite Things Palette


Too Faced came out with a brilliant idea for this year's holiday palette. A few of My favorite things holiday set has been raved a lot in social medias and from all beauty junkies + beauty gurus all around the world. Guess what?! The palette is so worth! I was aiming for it since November and hoping that Sephora Malaysia will bring this in. I kept the money aside until the end of November, there was no sign of hope and I spent it to Naked Basic and Luxola online shopping (click here to read the haul).  A big surprise came up when I visited Sephora at beginning of December. On that time, the price was RM 169 and I could not think anymore, I immediately grabbed it by using 10 % discount from my friend's member card, Kak Ayna.  Thank you so much for letting me using it. huhu. Then, a week after that, I received news from other beauty bloggers that the price has been marked down into RM 134! What a great deal! heart stabbed. 


This kit is known as a perfect complete palette where it includes a lip product, a mascara, a makeup bag, 2 blushers, 2 bronzers + highlighter , eyeshadows (there's eyeliner color, highlight color, glitters, eyebrow color & etc) Perfect for travelling too as the palette packaging is made from cardboard and can be fold into two. 


These are my favorites colors in the palette. Seriously,  they are dabommm! Can be used in daily basis & for night time makeup. 


The blushes and bronzers are very pigmented and smooth plus the colors includd in the palette are wearable! It is not like other palettes that I have found before this, most of them include non-pigmented and dull horrible colors just to mark up the value of the palette. But not for this palette, they are perfect! Blushers colors and bronzer combinations are great for all complexion from fair to dark skin tones. My favourite way of using the blushers is mix two of them and the colour created is amazingly gorgeous for Asian medium skin tone, warm and blush naturally. 

The bronzer Chocolate Soleil is matte finish while the Sun Bunny bronzer is a shimmery finish and it is gorgeous to be used from fair to medium skin tone. It adds some glow and it has duo jobs ; contouring and highlighting. The upper color of Sun Bunny works great for highlighting, pretty sheen of glow-y effect on cheek bones and the lower part is great for contouring. Site information: it is my favourite bronzer <3


Makeup bag can fits the palette and also the other two products, lip injection and mascara.

short comment: Lip Injection, some people say , the lipstick makes lips burning but what I know, the purposed of this lip product is to boost up the size of the lips. haha. To make the lips look bigger and sexier like Angelina Jolie of course! MMmmmuwah~. Suits wit the name, lip injection in bee sting. To those who has sensitive lips, better don't ever try this product. I haven't use it, but my bestfriends, Shaza had tried it and said it is not that bad. the burning feeling is bearable (to those who used to eat spicy food).


Swatches


Tuesday 24 December 2013

Storage Idea: Make up Brushes


 Hello people! I just came back from hometown! sorry for the missing update last weekend now I'm back with exciting posts queue to write about. This time I wanted to show you my new brushes organiser or storage idea since previously I stored them into a normal plain vase or pencil holder and now I found a new awesome place for them! Lets dive into the idea~!

Pappp parra pappa! (Doraemon style)
"New brushes organisers!" 

I have three cases and each case has different brushes. 
These organisers were purchased at Daiso. So the price range is between RM 5 to RM 10 :)


First:  My Sigma Collection. 
I stored them all in one case because of extra care and love (see I'm bias!) haha. Since the brushes are quite expensive for me (even not expensive like MAC and Bobbi Brown do, but they're still expensive of Malaysia currency Ringgits ) . Furthermore, I feel like collecting more Sigma brushes time by time. Maybe one month, one brush? or two months once? We will see how. I'm now focusing on "New Year" Resolutions. hahaha. 

The case size is perfectly fits all the eye brushes and also blush brushes. However, to fit powder brush, I don't think it could fits it in since the thickness of the case is only 2 cm and only can store small and thin brushes. Yet, Sigma Kabuki brushes are perfectly fit in the case. yeeeza~! 

Where to find this case: Daiso
Price:RM 5

For the second case, I store all of my eye brushes with assorted brands and unbranded brushes. Some of them are from Essence, Coastal Scents, Elianto, PRO, Definite, Real Techniques, Avon and etc. ^_^

Last case is the biggest size case where I put all my powder and big brushes in. The case is actually a paper file but I do think the case is pretty enough to store my brushes because it is kinda clear container eventhough it is not made from acrylic like the previous case num 1 and 2. 


Deeper and bigger size, can store a lot of brushes! May combine with eye brushes. 

Where to fnd this case: Daiso
Price: RM 10

Lastly is Kabuki brushes! I stored them all in one cute jar conatiner that I bought from Japanese Home Decor for RM 5. This case was introduced by my bestfriend, Lily. She kept her cotton buds and cotton pads / balls in it. 


Where to find this glass case: Japan Home Centre
Price: RM 5


That's all for my makeup brushes storage idea. Hope you enjoyed reading my brushes collection and at the same time giving you idea how to keep you brushes instead of putting them in a vase or holder. In this way, the brushes won't get dirty since they are tend to collect dusts. In other idea, you may find any tall cookie jars to store them in. This is a great idea too plus it would looks pleasant on your vanity table too! However, I couldn't find the jar in Malaysia yet. If anyone seen it, please tell me, I would like to have one. Hope this post could help you in organising your makeup brushes. ^_^ . Thank you! 


Wiida Ribbon


Related Posts Plugin for WordPress, Blogger...